
Before you start
Prerequisites and permissions
Have ready
- An active account and a connection.
Access rules
- SEO and integration changes require the relevant website permission. Only the Owner with custom-domain plan access may connect a domain.
Where to find it
Navigation map
- SEO
- Settings → Website Studio → Address & SEO → SEO
- Domain
- Settings → Website Studio → Address & SEO → Domain
- Integrations
- Settings → Website Studio → Address & SEO → Integrations
Walkthrough
Step by step
In each picture, the outlined area is what to look at.
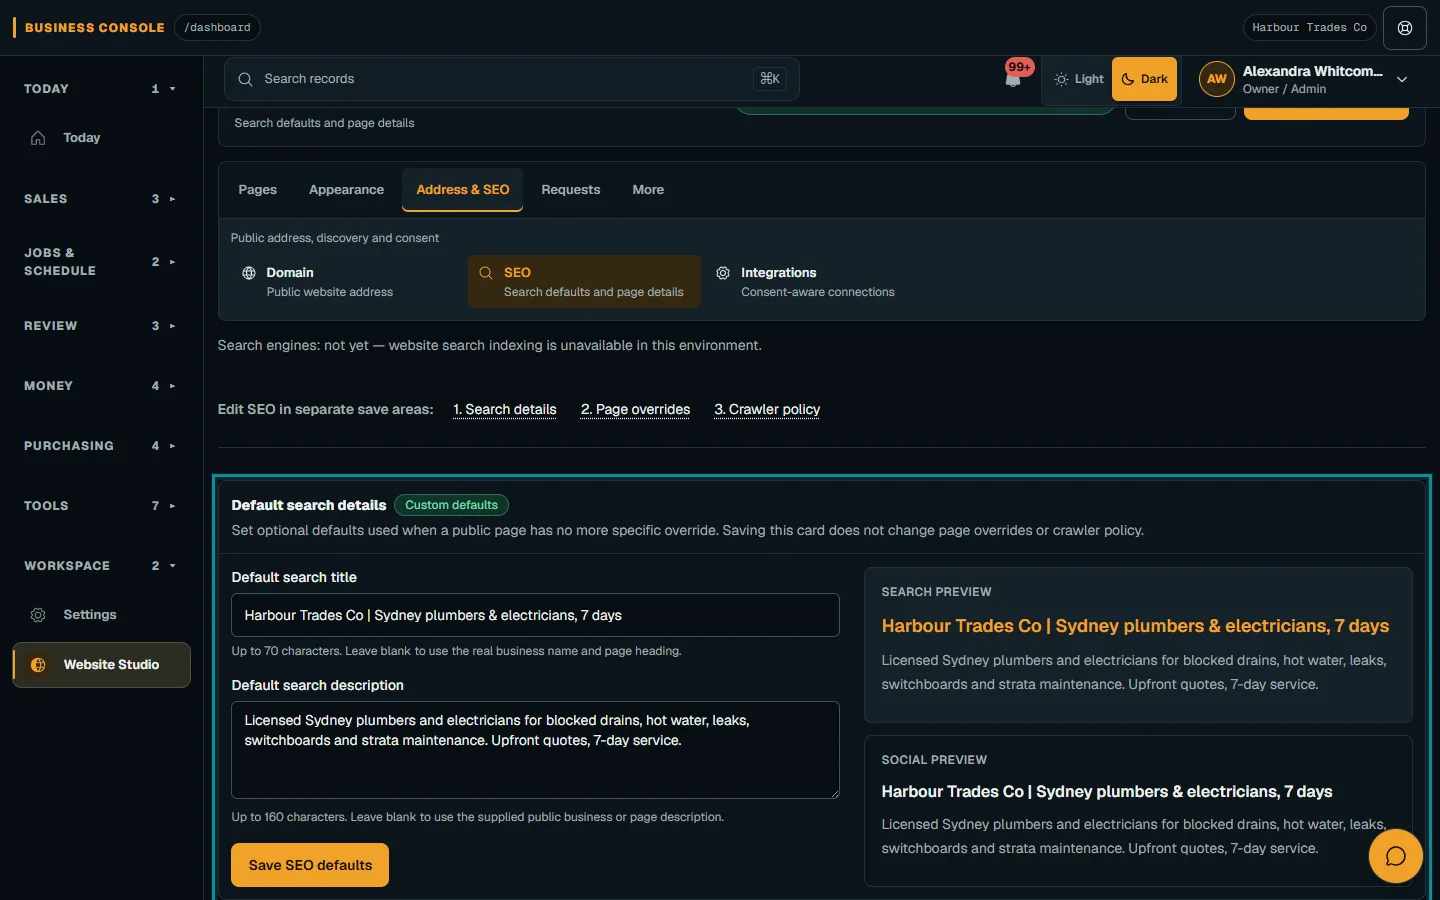
- 01
Choose the SEO edit area
Open Address & SEO → SEO. Save Default search details, Page overrides and Crawlers separately and read each result.
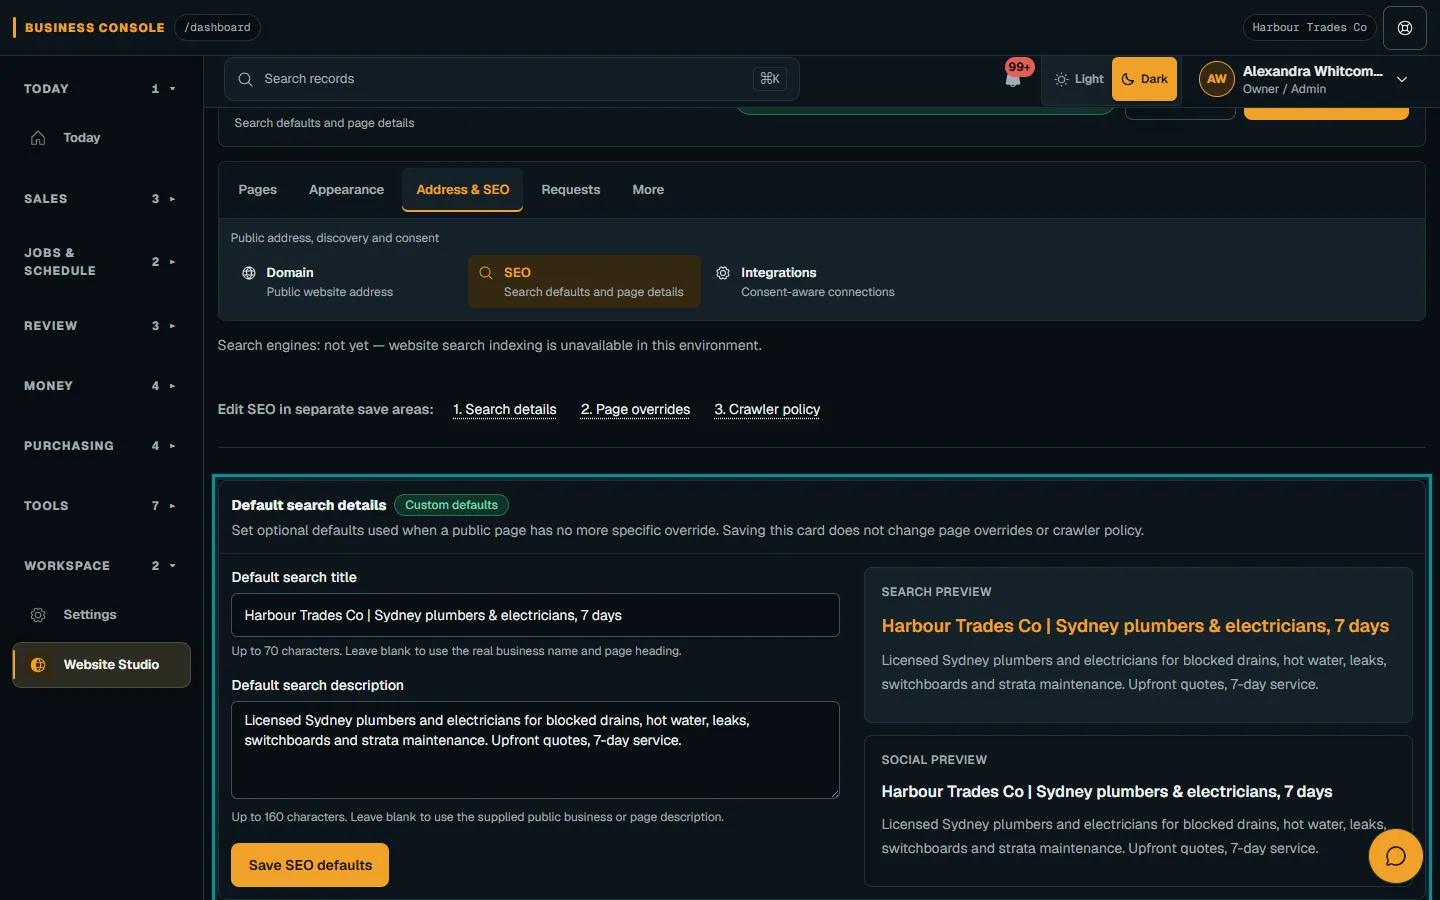
Open Address & SEO → SEO.Step 1 · Reviewed 2026-10-14Tap or click to open full size - 02
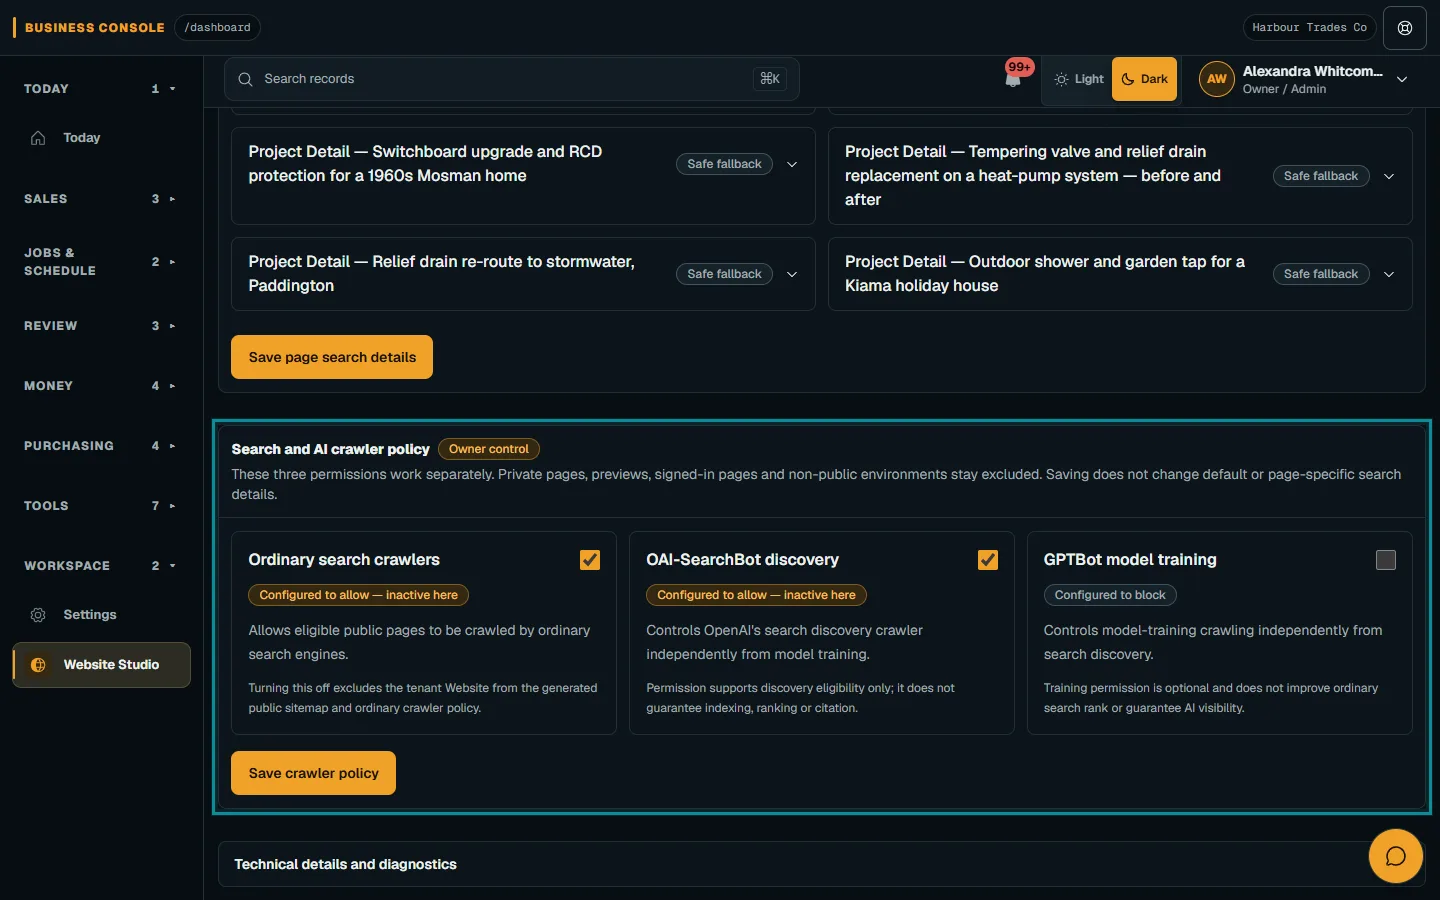
Check public facts
Check titles, descriptions, crawler choices, sitemap and public facts. Follow correction links; these settings do not guarantee rankings, traffic or AI citations.
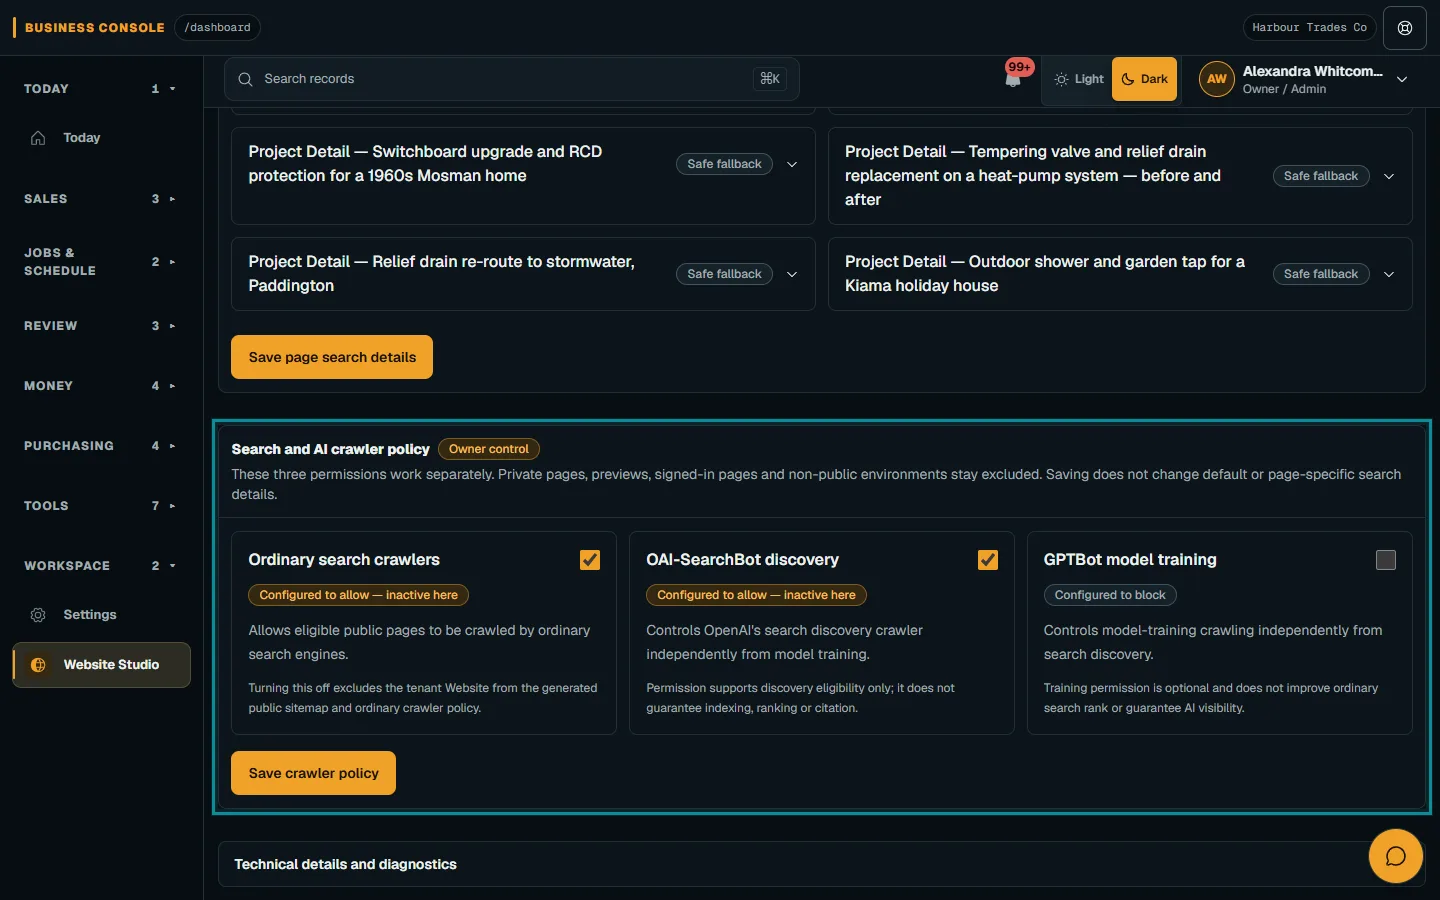
Check titles, descriptions, crawler choices, sitemap and public facts.Step 2 · Reviewed 2026-10-14Tap or click to open full size - 03
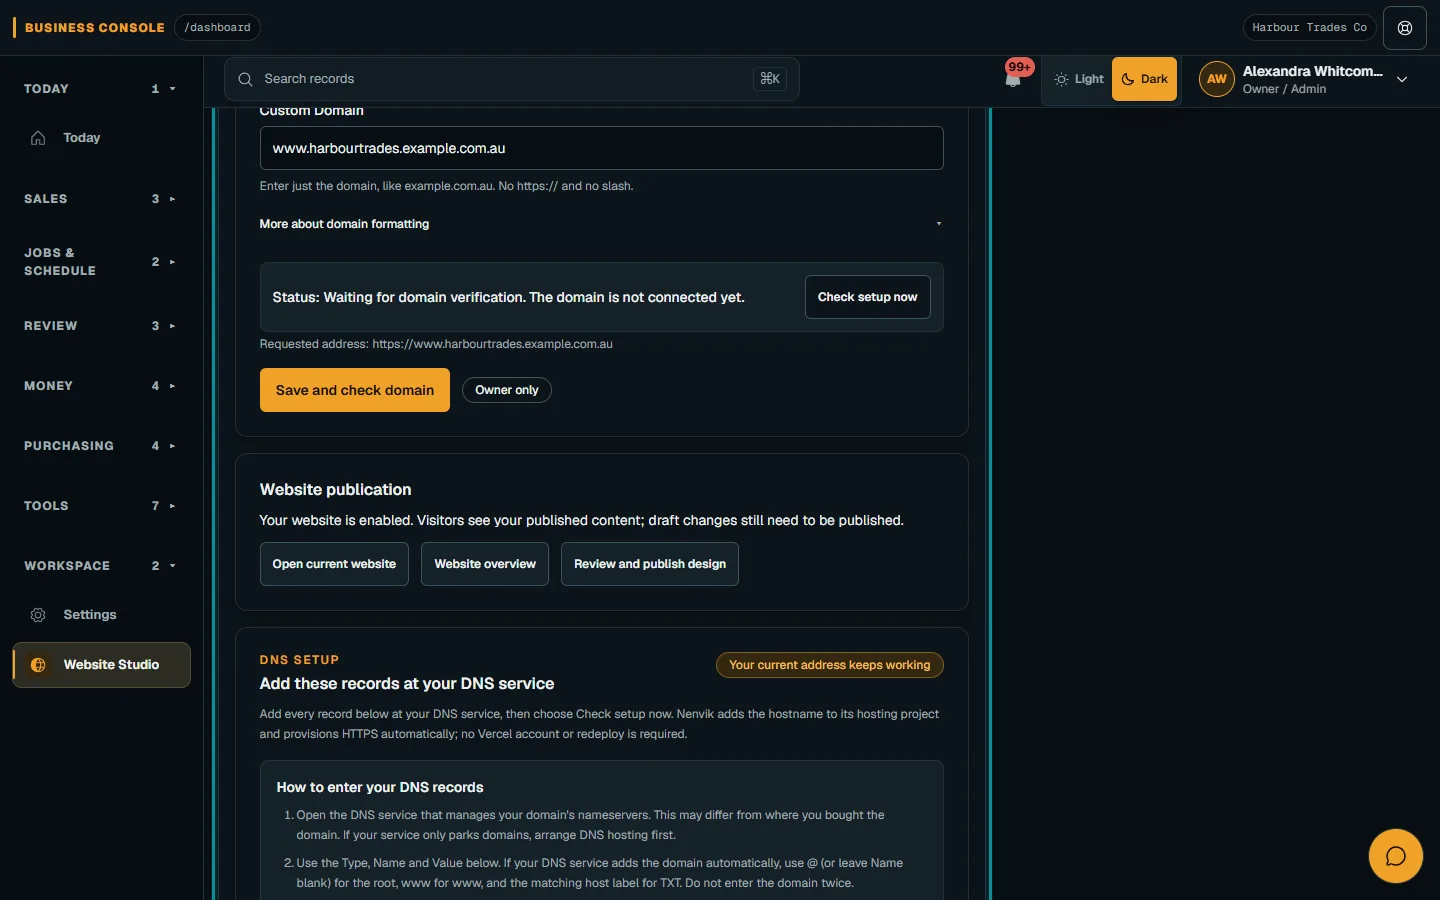
Connect the domain as the Owner
Open Domain, enter the hostname and choose Save and check domain. Follow the DNS instructions, then Check setup now; connection waits for verification, HTTPS and routing checks.
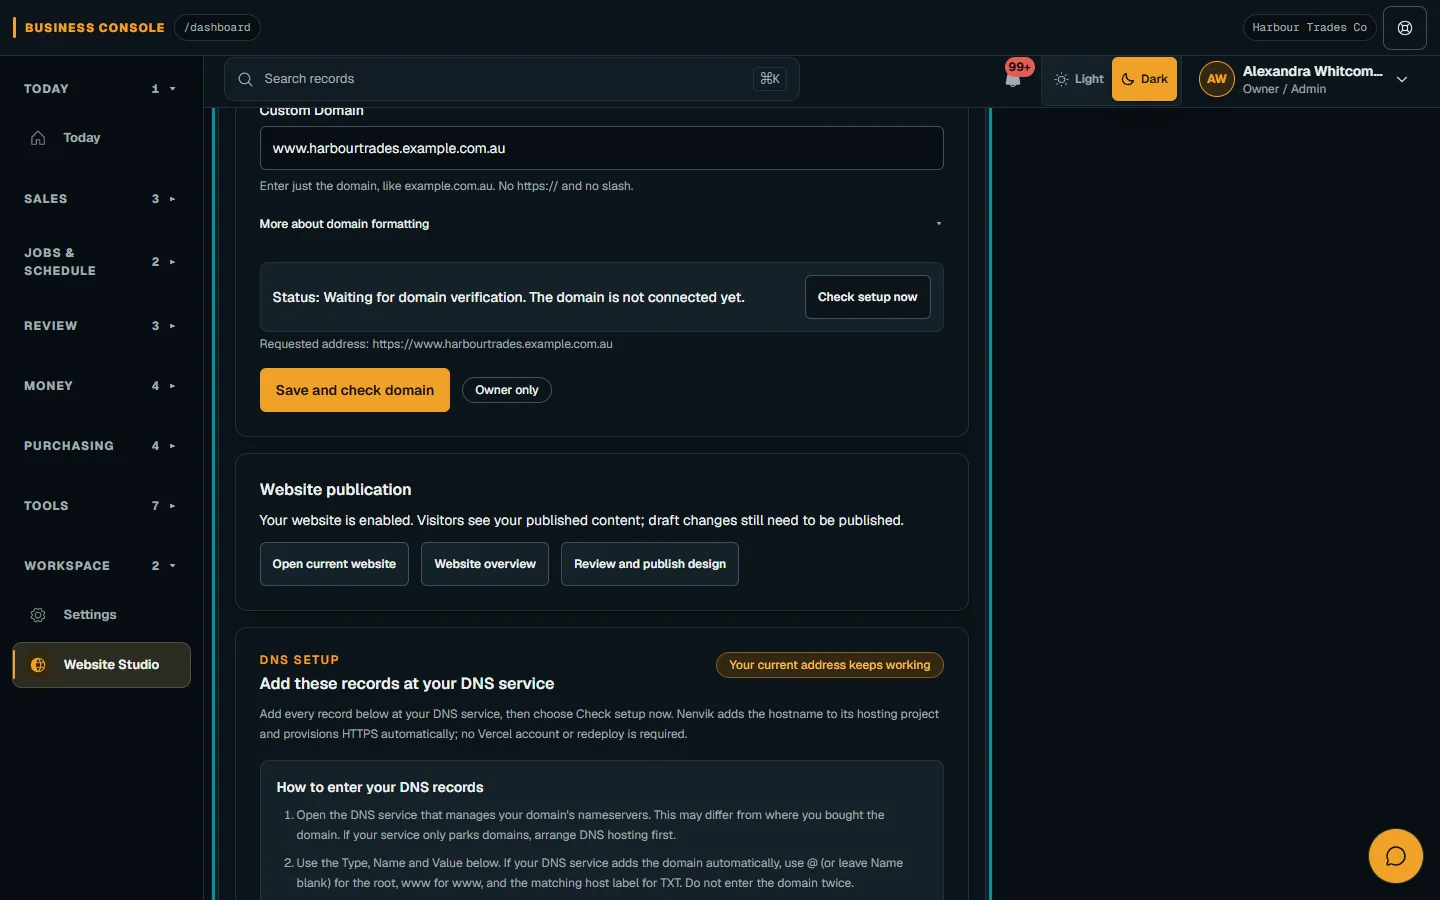
Open Domain, enter the hostname and choose Save and check domain.Step 3 · Reviewed 2026-10-14Tap or click to open full size - 04
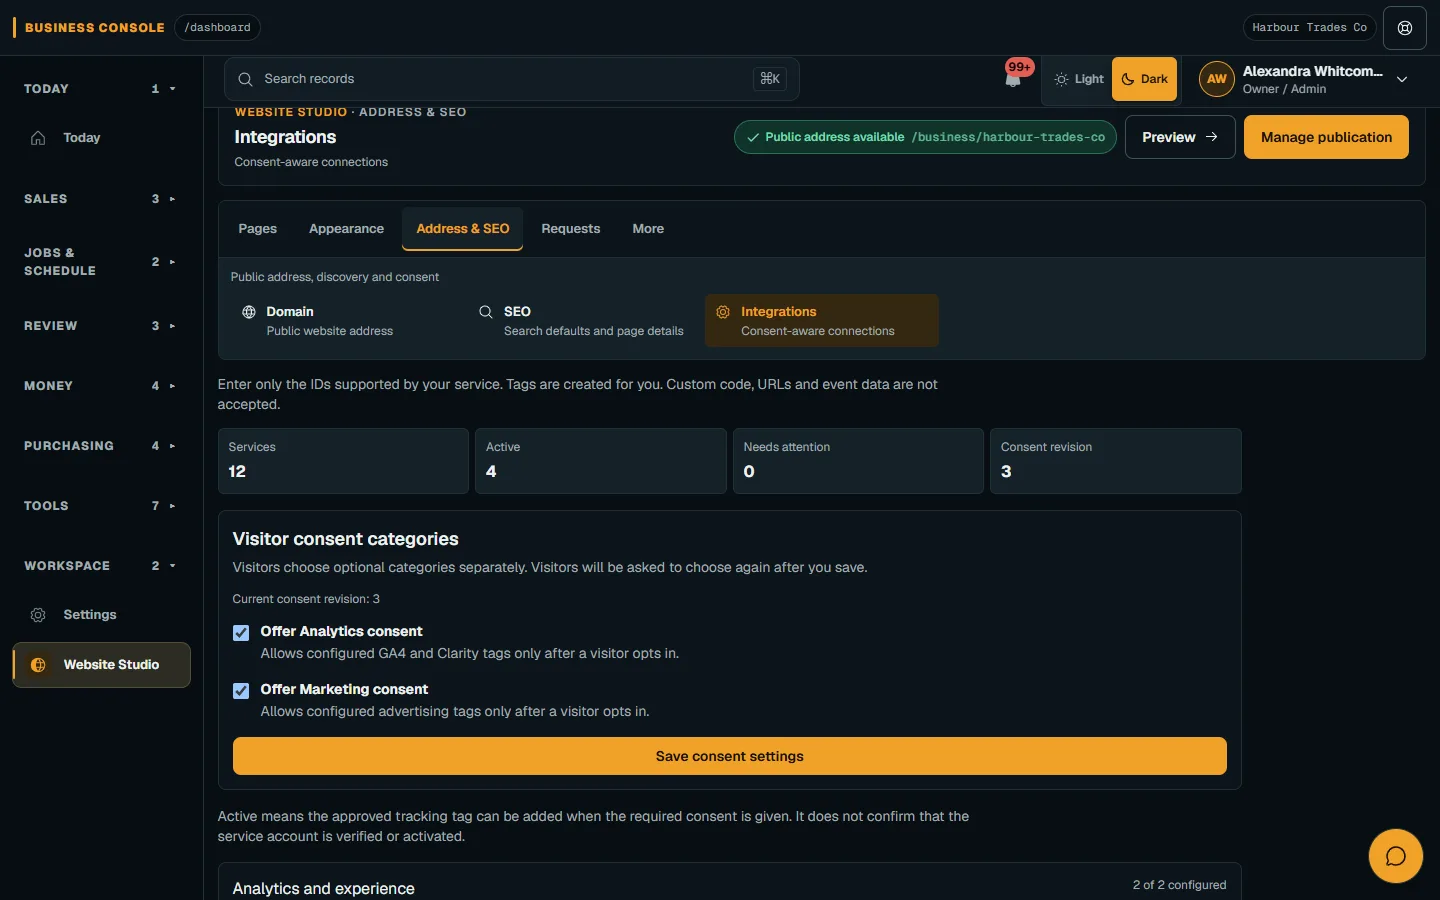
Review Integrations separately
Open Integrations to see supported connection fields and status. Check the intended service and business before saving; never enter credentials into unrelated fields.
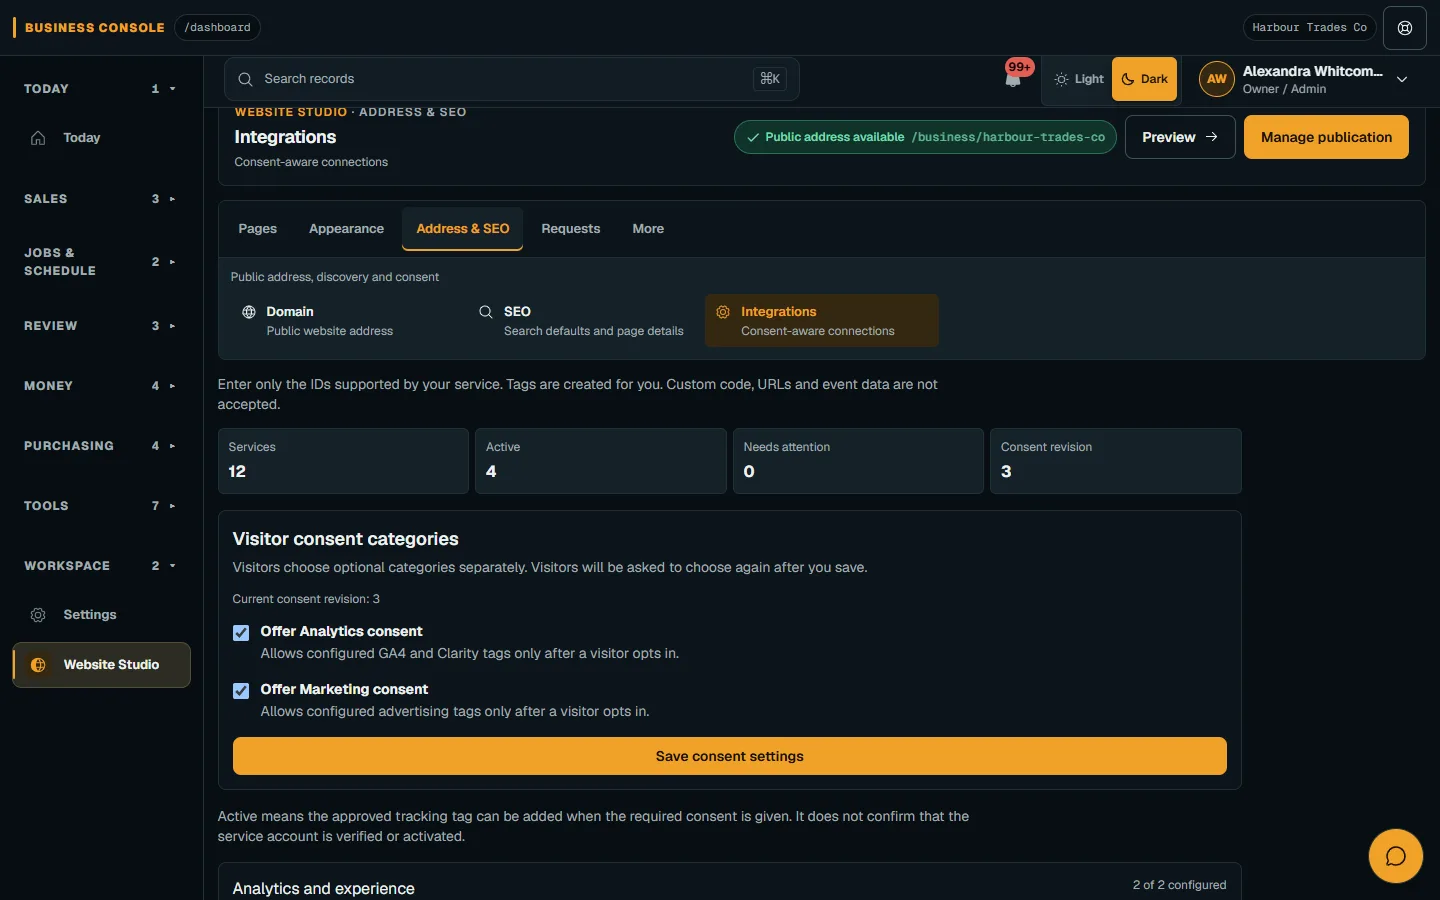
Open Integrations to see supported connection fields and status.Step 4 · Reviewed 2026-10-14Tap or click to open full size
Troubleshooting
If something does not look right
The action is unavailable.
Read the message on the page. Check your role and plan with the Owner. Reload after an approved access change; do not submit the same change twice.
Keep going