
Appliance repair records: models, serial numbers and history
Identify the right appliance, keep factual service entries and separate private job photos from the summaries you choose to share.
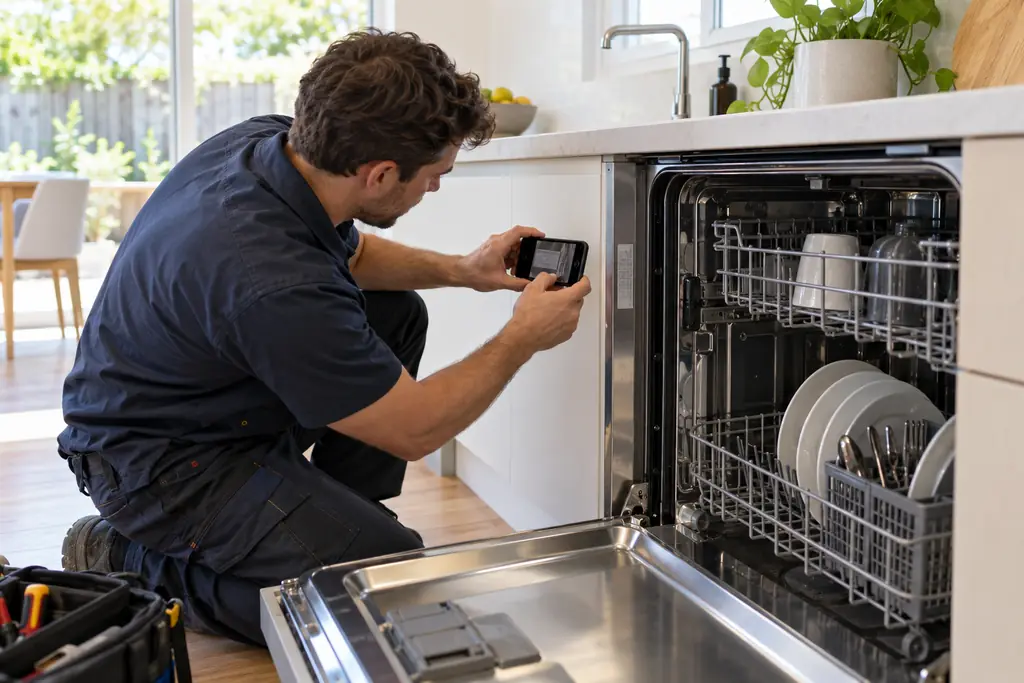
A note saying dishwasher repaired is difficult to use when the same customer has several appliances, another technician attends later or a replacement unit has been installed. Useful appliance service records begin with the equipment identity. The customer, property, model and serial number help the next person establish which unit was inspected before interpreting the notes about what happened.
When assessing appliance repair business software, follow a record from the initial enquiry through the visit and into the next service discussion. This guide explains Nenvik's customer equipment records, factual service history and separate job evidence. The appliance and equipment service workflow provides the broader context for connecting enquiries, repair quotes, jobs and customer invoices.
Identify the appliance before describing the fault
Ask which appliance needs attention and which property it belongs to. A customer may describe the unit by its position, while the office needs enough detail to distinguish it from equipment serviced previously. Confirm the identity at the visit rather than assuming that the newest request concerns the last unit your business repaired. Keep uncertain details clearly marked for checking.
- The customer responsible for arranging the service.
- The service property and a clear appliance name or description.
- The equipment category and manufacturer.
- The model number as shown on the unit.
- The serial number for that particular appliance.
- Installation or warranty dates when supported by available records.
- The reported issue, observed findings and next action for the visit.
Read model and serial details carefully. Similar-looking characters and an incomplete label can lead to an unhelpful record. Where it is safe and appropriate, take a clear photograph during the visit for the job evidence and check the entered text against it. Do not guess a missing character or silently copy an identifier from another appliance to complete the form.
Create a Customer Asset for the right customer
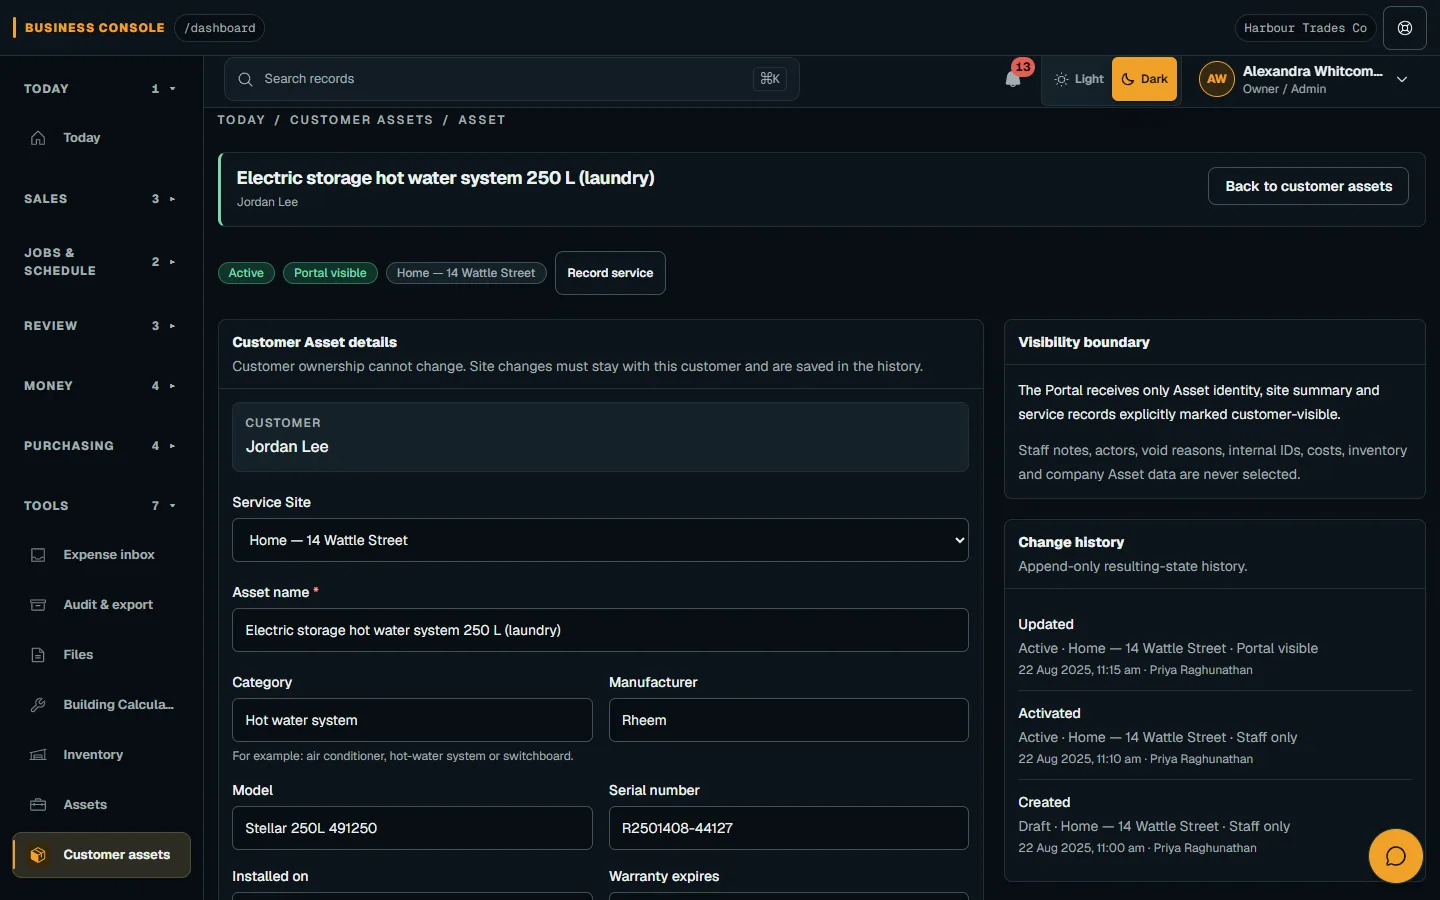
Nenvik's Customer Assets and service history guide describes customer-owned equipment. Create a Draft Customer Asset for an active Customer and optionally choose an active Service Site belonging to that same Customer. Check Saved in Customer assets, then open the highlighted draft. A site belonging to another Customer cannot be assigned to the record.
Enter the name, category, manufacturer, model and serial number, with optional installation and warranty dates. Use a name and description your team can recognise during a later visit. Keep the equipment identity separate from the customer's reported fault: the appliance remains the same unit even when a later visit concerns a different symptom or a new repair request.
Use customers and service sites to organise the commercial relationship and property details. Check the selected property when a customer manages several locations. In the appliance record, the optional site association helps identify where the unit belongs; the visit instructions should still explain the attendance arrangements and the exact work area the technician needs to find.
Record warranty dates without making coverage claims
Nenvik provides optional installation and warranty dates, with warranty expiry unable to precede installation. Enter dates from information you have checked, and leave unresolved information for review rather than inventing it. Explain the source and any uncertainty in the appropriate work record. A date entered by the office should not become an unsupported promise made to the customer.
Keep recording a date separate from deciding whether a particular repair is covered under a manufacturer's arrangement. Review the relevant documents and direct questions to the appropriate party when needed. This article describes organising service information, not warranty entitlements. Give the technician enough context to ask a useful question without treating a saved expiry date as the answer to every repair enquiry.
Keep visit photos with the job evidence
The asset identity and the visit evidence answer different questions. The equipment record identifies the unit; the job evidence explains what the technician found and did during attendance. Choose photos that serve that purpose, such as the unit identity, the area being investigated or the result of the work. Avoid unrelated people, credentials and private customer material in the frame.
The field evidence and time guide describes Photos and the other areas of the assigned job workspace. Workers use the controls offered for their current assignment and add only evidence needed for that work. Keep the appliance reference clear in the visit notes. Do not assume that taking a photo automatically creates an asset record or a service-history entry.
Assignment evidence stays private unless a separate authorised customer-publication action is used. Uploading a job photo is therefore not the same as sharing it with the customer. Review the intended audience before promising access. If the office needs more information, ask for a specific missing detail rather than collecting a large set of images that nobody can connect to the recorded work.
Write a factual service-history entry
In the Customer Asset workflow, choose the service type and actual time, then add a factual summary. You can optionally link a Job for the same Customer; check that it matches the current Service Site too. Put internal details in the private staff note. A service entry records what happened and should distinguish completed work from a recommendation that still needs a decision.
A useful summary explains the reported issue, observations, work performed and any outstanding action in terms the next technician can understand. Identify the relevant visit rather than relying on the order in which someone typed notes. If a part or further inspection is only proposed, say so. Avoid turning an incomplete diagnosis into a definitive finding simply to make the record sound finished.
Recorded service facts cannot be edited or deleted. If an entry is incorrect, void it with a reason and add a corrected entry. Review the identity and summary before recording them, particularly where several similar appliances are involved. This preserves the history while allowing the business to explain a correction instead of quietly replacing what an earlier worker recorded.
Share equipment details and summaries deliberately
Draft Customer Assets are staff-only. Activate the asset, then explicitly enable Customer Portal visibility when suitable. Mark a service summary customer-visible only when it is ready to share. The customer agreements and assets guide explains the customer's view. The Portal excludes private staff notes, internal identities, void reasons, costs and accounting data from this service history.
If a summary is missing from the Portal, check that it is not voided and was deliberately marked customer-visible. Also check the asset's status, visibility and the customer's current access. Do not broaden access to unrelated records to solve a missing entry. Customer equipment remains separate from the business's own Company Assets and consumable Inventory, so use the correct register from the start.
Use the history to prepare the next handover
Check the appliance reference again when preparing a repeat visit. If the customer reports that the unit has been replaced, resolve the identity before carrying earlier findings into the new work instructions. A useful handover says which details are confirmed and which need checking on arrival. That gives the next technician a clear starting point without turning an assumption into part of the service history.
Before another visit, compare the current appliance identity, earlier service facts and the new request. A service-history entry does not schedule maintenance or send a reminder. Decide the next action separately and make it clear to the office. The related guide to HVAC service invoicing offers another equipment-service example where history, work evidence and billing need distinct review.
For a paper visit checklist, the free job sheet template can prompt the technician to check the appliance reference and record outstanding work. Whatever format you use, the test is practical: can another person identify the unit, understand the recorded service and see what remains to be decided without asking the original technician to reconstruct the visit?
Common questions
Can Nenvik store appliance model and serial numbers?
Yes. Customer Assets support a name, category, manufacturer, model and serial number, plus optional installation and warranty dates. A Service Site belonging to the same Customer can be selected.
Are job photos the same as an asset service-history entry?
No. Photos are part of assigned job evidence. Record the equipment identity and factual Customer Asset service entry through their respective workflows rather than assuming one action creates the other.
Can a saved service-history entry be edited?
Recorded service facts cannot be edited or deleted. Void an incorrect entry with a reason and add a corrected entry.
Can customers see every note about their appliance?
No. Asset Portal visibility and customer-visible service summaries are deliberate choices. Private staff notes, internal identities, void reasons, costs and accounting data are excluded from the Portal service history.
More from the blog
 Locksmith call-outs: dispatch, install quotes and getting paid on siteKeep urgent call-outs and planned installs in the same diary, with clear job records, agreed charges and confirmed payments.Read article
 Deposits on quotes: a practical guide for tradiesExplain a deposit before the customer accepts, check the resulting invoice and confirm payment separately from acceptance and scheduling.Read article
 Late payments and invoice reminders for tradiesMake the invoice clear, check the live balance before following up and use reminders with a deliberate delivery setup.Read article